Many students will return to biking and walking for transportation when they start college. One form of active transportation that may be new to students, though, is using the local public transportation system to get around. For students and non-students alike, using a city bus or train for the first time can be an intimidating hurdle. We updated this guide to public transportation fairly regularly, but sometimes things change fast–always check with your local transit system to be sure the information you have is accurate.
Skip to:
When you start using a new-to-you transit system, planning is a must. Check out your local transit system’s website for routes, maps, and schedules–many systems also have built-in trip planners on their websites. It’s often a good idea to have a Plan B just in case things go wrong with your first plan. Make sure to find out how much your fare will be while you’re checking the schedule!
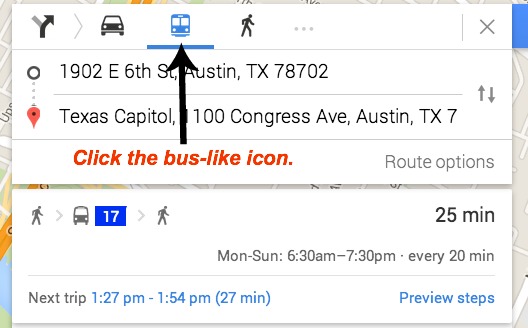 Most transit systems in the U.S. have shared their data with Google. (Edit: Transit app is an excellent resource that covers most transit systems in the US and Canada, plus several other countries. Whether you’re riding a bus for school or traveling to a new city for fun, it’s well worth the download.) If that is the case in your area, go to maps.google.com, put in your starting point and destination, and choose the transit button (see the picture at the right). Google will give you a few options to get where you’re going, based on local transit data. You should also check with your local transit system to see if they have an in-house app with a trip planner.
For students, you often will get free or discounted transit rates with your student ID. Check with your college or university’s transportation department to find out if your ID is your pass or if you need to get a different one, what services your ID covers, and so on.
Once you arrive at the stop, be sure to look for the bus number above the front windshield before you board– nothing ruins a transit trip faster than getting on the wrong bus.
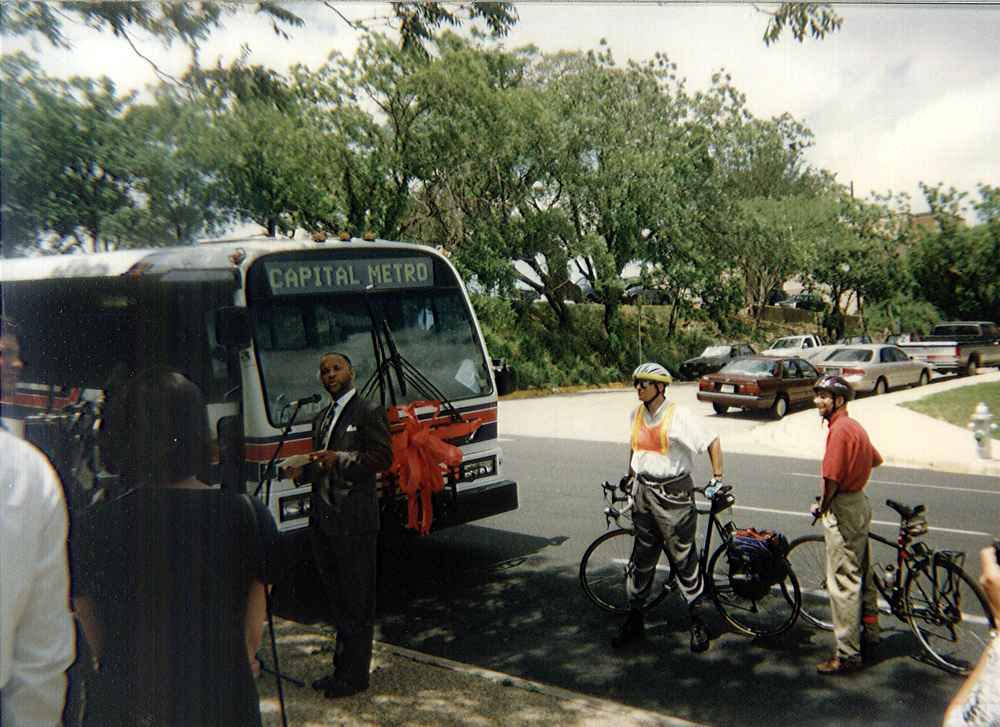
Yes, you can combine a bus (or train) and bike trip! We’re proud that all train systems in Texas have on-board bicycle accommodation, and most buses have bike racks on the front capable of carrying two or three bikes.
Photo: from our archives, Austin’s– and Texas’s!– first bike rack on a bus, sometime in the mid-’90s.
How to use the bike rack:
- First, be sure the driver sees that you are about to load a bike on the bike rack.
- If the rack is already open, just load your bike in a open spot. Be sure to put the front wheel in the slot designated for the front wheel. If the rack is folded against the the bus, squeeze the handle to release the rack and lower it down. Put your bike in the slot nearest the bus.
- Many racks have an arm with a hook on the end. Pull this arm out and over the front wheel. Instead of the arm, your bus may have a U-shaped loop for the front tire– rotate this around until the sides of the loop are around your tire and the top of the loop is resting against it.
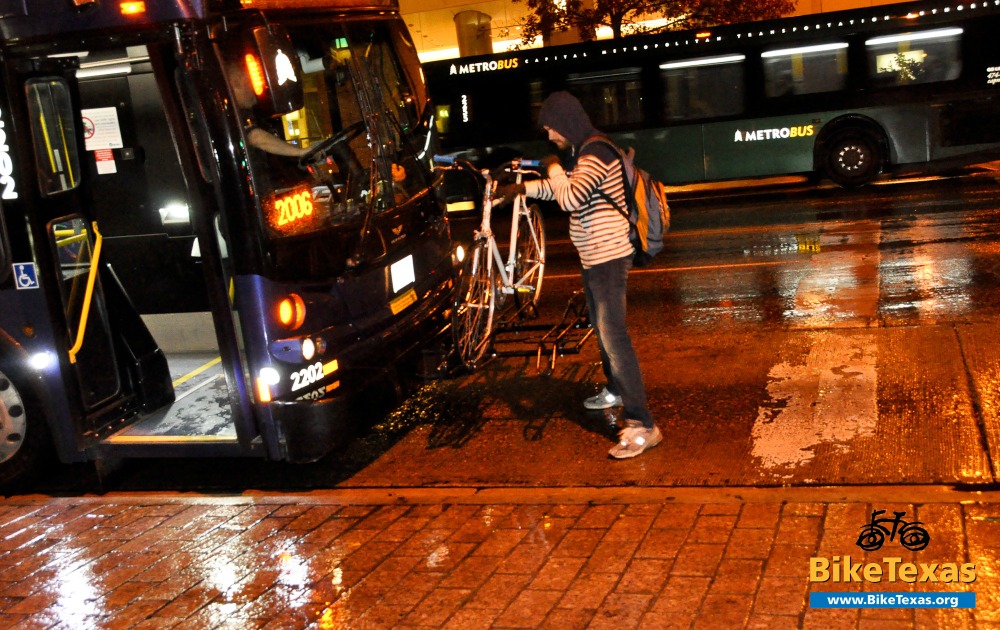 If you have anything loose on your bike, like a water bottle or your helmet over the handlebar, remove those and carry them on board with you.
- If you have panniers on your bike, the driver may ask you to remove them and bring them on board if they obscure the driver’s line of sight. For buses with 3-place bike racks, you should remove the panniers before loading, because the slots are too close together to allow space for panniers. Be sure you can quickly remove your panniers, if needed, before you head to the bus stop.
- Board the bus! When it’s time to get off, tell the driver you’re getting your bike, exit through the front door, and reverse the process. If your bike is the last one off the rack, squeeze the handle again and fold the rack up against the front of the bus.
- Having a hard time visualizing these steps? Not to worry, CapMetro in Austin put together a handy video that will show you everything you need to know.
What if the bike rack is full? Sorry, you’ll have to wait for the next bus. This scenario is one reason you should always have a backup plan or an alternate route in mind so you don’t get stuck, especially if you’re taking a popular route.
On a train:
Look for the bicycle accommodation space and load your bike there. If the space is full or you’re not comfortable using it, you’ll have to stand holding your bike. Use good sense and common courtesy when boarding a full train or traveling during peak hours– there may not be room for your bicycle on board.
Finding out the fare for your journey should be part of your planning stage, but if you forget, the driver can tell you. You will need exact change on the bus (or pay with an app). Basically, it’s like a vending machine: bills and coins go in the appropriate slots. If you have a pass, you should swipe it on the farebox before taking your seat. Buying a pass onboard? Don’t forget to take it with you when you take your seat.
Please note that most transit systems have rules that prohibit the driver from handling fares, so he or she will not be able to take your money or swipe your card for you. However, they will be able to answer questions if you’re having trouble.
Seats near the front of bus or train car are reserved for the elderly, people with disabilities, or people with small children (many transit systems require that children under 6 be seated instead of standing). If you do not fall into one of those categories but choose to sit in one of these priority areas, please be prepared to vacate the seat if someone should need it.
If you stand, be sure you have something to hold on to so you don’t fall over on top of your neighbor if the bus should suddenly slow down.
Generally speaking, food and drink are not permitted on board most transit vehicles. Save your sandwich for when you arrive and don’t try to bring a fast food cup with you– the driver will ask you to throw it away before boarding. No one likes a crumby, sticky bus.
Finally, remember that your backpack or grocery bags don’t really need a seat, but other humans do– be courteous with your things.
When you first start riding with a new transit system, be sure to take a few moments once you’re on board to look around and find out what the signaler is. It will usually be a cord or a button. A couple of blocks ahead of your stop, pull the cord (or press the button) to signal your stop. Exit through the door nearest you (unless you’re getting your bike off the rack– in that case, use the front door). Be sure to look around as you’re getting ready to exit the vehicle to make sure you have all your belongings with you. And thank the driver as you exit– it makes you feel good and may just brighten their day.
Gather info about the return trip as part of your research– find out when the bus is expected, where you should catch it, and so on. Repeat all the previous steps again, and then congratulate yourself on a successful transit trip!
Happy riding!
